When it comes to waterproofing your basement walls, following a systematic approach is vital. Start by evaluating the current condition of your walls to identify any moisture issues. You’ll need specific tools and materials for the job, so gather those before proceeding. Cleaning the walls thoroughly is essential to guarantee proper adhesion of sealants. But what comes next might surprise you, especially if you discover underlying problems that require more than just a simple sealant.
Key Takeaways
- Begin by assessing the current condition of basement walls for moisture, cracks, and gaps.
- Clean the walls thoroughly, removing dirt and debris to prepare for waterproofing.
- Repair any visible cracks or holes using hydraulic cement or epoxy filler.
- Apply a high-quality waterproofing sealant in layers for effective moisture protection.
- Consider installing a drainage system or sump pump for areas prone to flooding.
Assess the Current Condition of Your Basement Walls
Before you plunge into waterproofing your basement walls, it’s essential to assess their current condition.
Start with a thorough wall inspection to identify signs of basement moisture, such as dampness, stains, or efflorescence. Check for cracks or gaps that may allow water infiltration. Use a moisture meter to measure humidity levels; anything above 60% indicates a potential problem.
Conduct a thorough inspection for moisture signs, check for cracks, and use a moisture meter to assess humidity levels.
Pay close attention to corners and joints, as these areas often harbor issues. Document your findings to prioritize repairs.
Addressing these conditions now will enhance the effectiveness of your waterproofing efforts, ensuring your basement remains dry and healthy in the long run.
Gather Necessary Tools and Materials
Before you start waterproofing your basement walls, you need to gather the right tools and materials.
Essential tools include a brush, trowel, and a pressure washer, while recommended waterproofing materials typically consist of sealants, membranes, and drainage systems.
Having these on hand will streamline your project and guarantee effective results.
Essential Tools Needed
When tackling the waterproofing of your basement walls, having the right tools and materials at your disposal is vital for an effective job.
You’ll need a high-quality brush or roller for applying sealant, a paint sprayer for larger areas, and a trowel for any patching work. A utility knife helps with cutting materials, while a wet/dry vacuum is important for cleanup.
Don’t forget essential safety gear: gloves, goggles, and a mask to protect against fumes.
Having a moisture meter on hand can help you evaluate the effectiveness of your waterproofing techniques, ensuring a successful project.
Recommended Waterproofing Materials
Selecting the right waterproofing materials is essential for ensuring your basement walls remain dry and protected from moisture.
Start with high-quality waterproofing membranes, which create an effective barrier against water infiltration. Look for products that are durable and resistant to mold.
Additionally, consider using moisture barriers, like polyethylene sheeting or liquid-applied options, to further enhance protection.
Make sure to choose materials that are appropriate for your specific basement conditions. Don’t forget to check for compatibility with your existing wall surfaces.
Investing in the right materials will lead to a successful waterproofing project and a drier, healthier basement.
Clean the Basement Walls Thoroughly
Start by removing any dirt, dust, and debris from your basement walls to guarantee an effective waterproofing process.
Use appropriate cleaning techniques and effective detergents to confirm a clean surface. Follow these steps:
- Wet the Walls: Use a hose or pressure washer to dampen the surface.
- Apply Detergent: Choose a suitable detergent and scrub the walls with a stiff brush.
- Rinse Thoroughly: Remove all detergent residue with clean water.
- Dry the Walls: Allow the walls to dry completely before proceeding to the next step.
A clean surface is essential for proper adhesion of your waterproofing materials.
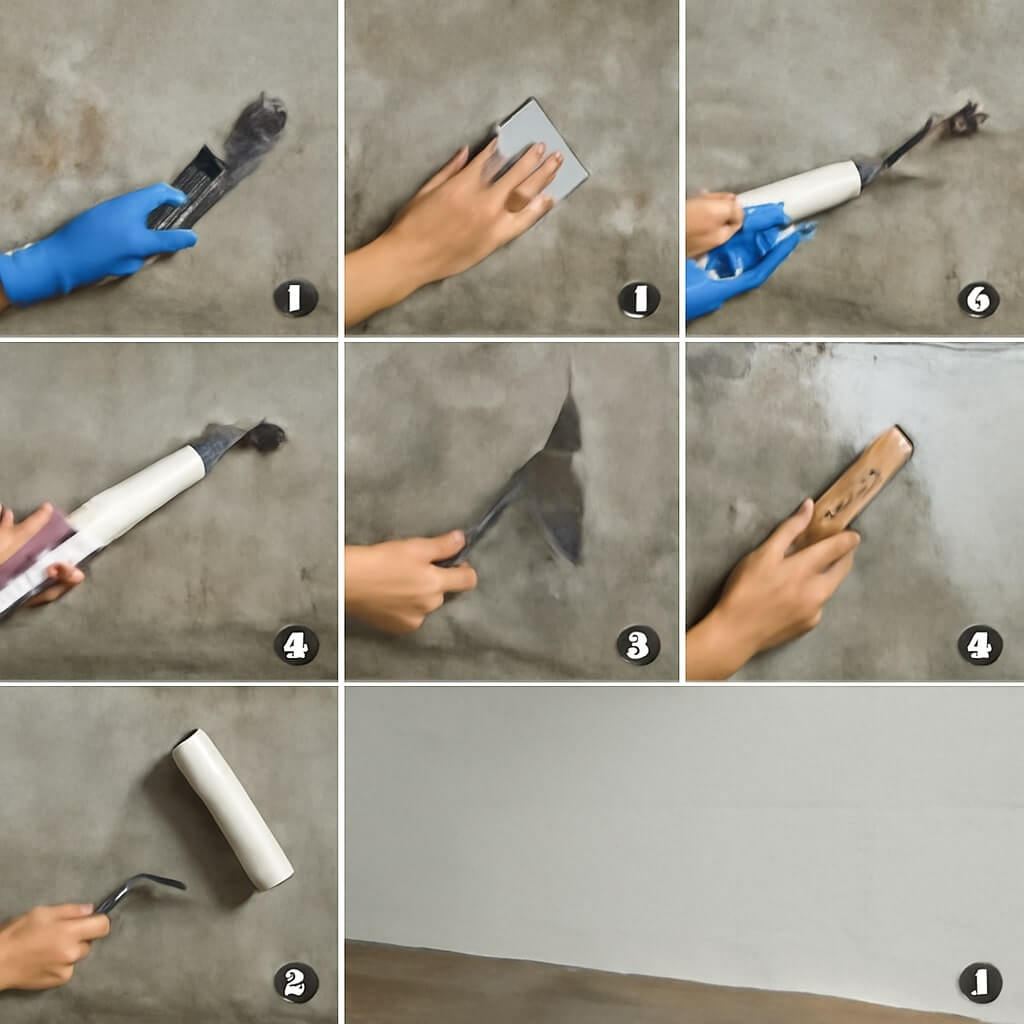
Repair Any Cracks or Holes
Before applying any waterproofing treatment, you’ll need to identify visible cracks and holes in your basement walls.
Use a chisel to widen the cracks slightly, then fill them with a high-quality hydraulic cement or epoxy filler.
Once filled, seal the area with a waterproof sealant to guarantee a tight barrier against moisture.
Identify Visible Cracks
Identifying visible cracks in your basement walls is essential for effective waterproofing, as even small fissures can lead to significant water intrusion.
To guarantee a thorough inspection, follow these steps:
- Look for horizontal and vertical cracks: These can indicate structural issues.
- Check for any damp or discolored areas: Visible damage often accompanies cracks.
- Examine the corners and joints: These are common weak points.
- Inspect after heavy rain: Water might reveal hidden issues.
Fill and Seal
To effectively waterproof your basement, it’s vital to fill and seal any cracks or holes you’ve identified.
Start by cleaning the area around the crack to guarantee proper adhesion. For small gaps, use a polyurethane or silicone sealant, which provides flexibility and durability.
For larger cracks, apply a suitable fill material, like epoxy or hydraulic cement, and smooth it out to match the wall surface. Allow it to cure as per the manufacturer’s instructions.
Finally, seal the filled areas with a compatible waterproof sealant to enhance protection against moisture intrusion. This step is critical for a successful waterproofing project.
Apply Waterproofing Sealant
Once you’ve prepared the surface of your basement walls, applying a waterproofing sealant becomes crucial to prevent moisture intrusion.
Follow these steps for effective sealant application:
- Choose the Right Sealant: Select a high-quality waterproofing sealant suitable for interior use.
- Use Proper Tools: Equip yourself with a roller, brush, or spray gun for even application.
- Apply in Layers: Start with a thin layer; allow it to dry before adding additional coats for maximum protection.
- Inspect and Touch Up: After drying, inspect for any missed spots and apply touch-ups as needed.
This thorough approach guarantees your wall preparation effectively keeps moisture at bay.
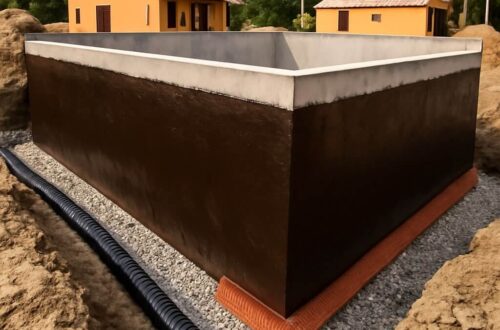
Install a Drainage System if Necessary
If your basement experiences frequent moisture issues, installing a drainage system can be a game changer.
Start by evaluating your basement’s layout and identifying areas where water collects. Consider drainage solutions like French drains, which redirect water away from walls.
If you have significant water accumulation, installing a sump pump is critical. It’ll actively remove water that collects in a sump basin, preventing flooding. Make sure the sump pump is properly connected to an exterior drainage system.
Always check local building codes before installation to guarantee compliance. This proactive approach will keep your basement dry and protect your investment.
Monitor and Maintain Your Waterproofed Walls
After installing a drainage system, keeping an eye on your waterproofed walls is essential for long-term effectiveness.
Monitoring your waterproofed walls is crucial after installing a drainage system to ensure lasting protection against moisture.
Implement the following steps for ideal maintenance:
- Conduct regular inspections of wall surfaces for cracks or signs of moisture intrusion.
- Test your drainage system monthly to verify it’s functioning properly and diverting water away.
- Utilize moisture monitoring devices to detect humidity levels, allowing for timely interventions.
- Clear debris from gutters and downspouts to prevent overflow, which can compromise your waterproofing efforts.
Conclusion
By following these seven steps, you can effectively waterproof your basement walls and protect your home from moisture damage. Start by evaluating your walls and gathering the right tools, then clean and repair any imperfections before applying a high-quality sealant. If moisture issues persist, consider installing a drainage system. Regular monitoring and maintenance will guarantee your efforts provide lasting protection. With diligence, you’ll create a dry, safe environment in your basement for years to come.