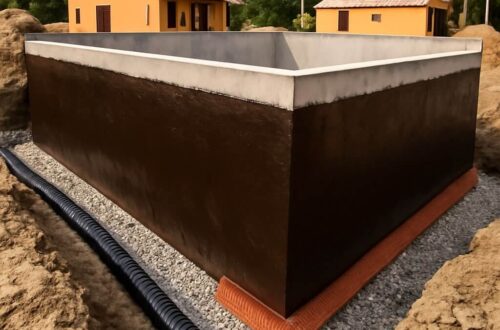
If you’re facing moisture issues in your basement, a French drain might be a viable solution. This system directs water away from the foundation, preventing accumulation and structural damage. To effectively implement a French drain, you’ll need to assess your property’s drainage needs, plan the installation carefully, and follow a precise step-by-step process. Understanding each aspect is essential for ensuring long-term effectiveness and maintenance. Let’s explore how to get started.
Key Takeaways
- Assess your property for water accumulation and determine the best trench route for effective drainage around the basement.
- Excavate a trench at least 18-24 inches deep, ensuring a minimum slope of 1% for optimal water flow.
- Install a perforated pipe at the base of the trench, with holes facing downward, to collect and redirect water away from the foundation.
- Cover the pipe with gravel to facilitate drainage and prevent debris from entering while backfilling the trench properly.
- Regularly maintain the system by inspecting for clogs and ensuring that inlet grates are clear to promote effective waterproofing.
Understanding the French Drain System
A French drain is an effective solution for managing water drainage around your basement. It operates based on drainage principles, using a trench filled with gravel and a perforated pipe to redirect water away from your foundation.
By guiding surface and groundwater away, it prevents flooding and moisture intrusion. The installation benefits are significant; it reduces hydrostatic pressure against walls, minimizes mold growth, and protects your property’s structural integrity.
Additionally, proper installation can enhance your home’s value and longevity. Understanding these aspects guarantees you make informed decisions about implementing a French drain system effectively in your waterproofing strategy.
Planning Your French Drain Installation
Proper planning is essential for a successful French drain installation.
Begin with a thorough site assessment to identify areas prone to water accumulation. Analyze the existing landscape and determine the best drainage slope, ensuring water flows away from your basement.
Conduct a detailed site assessment to pinpoint water accumulation zones and establish an effective drainage slope away from your basement.
Mark out the proposed trench route, considering any obstacles like utility lines or landscaping features. Choose the right materials based on your soil type and drainage needs.
Additionally, think about the outlet point for the collected water, ensuring it leads to a suitable area.
Step-by-Step Installation Process
Once you’ve completed your planning, you can begin the installation of your French drain with a clear understanding of the necessary steps.
First, gather your installation tools, including a shovel, level, and drainage materials like perforated pipe and gravel.
Next, mark the trench’s layout, ensuring a slope of at least 1% for ideal drainage.
Excavate the trench to a depth of about 18-24 inches.
Place a layer of gravel at the bottom, then lay the perforated pipe, ensuring the holes face downward.
Cover the pipe with more gravel, then backfill the trench.
Compact the soil and restore the surface.
Maintaining Your French Drain
After installing your French drain, ongoing maintenance is necessary to confirm it functions effectively over time.
Regularly inspect the drain for debris buildup, which can lead to clogs. Use cleaning techniques such as flushing the system with water or using a wet/dry vacuum to remove sediment.
Be vigilant about common issues like standing water or foul odors, indicating potential blockages. Additionally, check the inlet grates and confirm they’re clear of leaves and dirt.
Maintaining proper drainage flow will extend the lifespan of your French drain and protect your basement from water damage. Regular attention is key to effective performance.
Additional Waterproofing Tips for Basements
While installing a French drain is an essential step in basement waterproofing, there are several additional strategies you can employ to further safeguard your space.
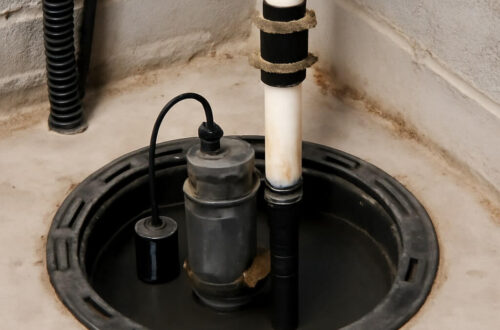
Consider installing sump pumps to efficiently manage groundwater and prevent flooding. These devices actively pump out excess water, ensuring your basement remains dry.
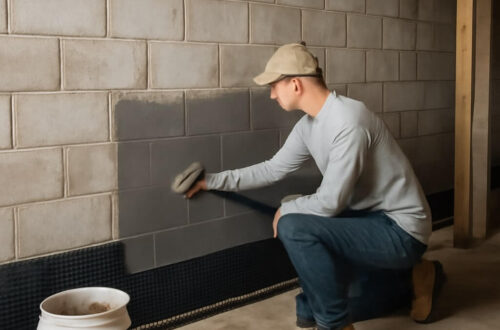
Additionally, apply waterproof paints to walls and floors, creating a protective barrier against moisture intrusion. Select high-quality products designed for masonry surfaces, enhancing durability.
Regularly inspect these systems and coatings to maintain their effectiveness. By combining these methods with your French drain, you’ll markedly reduce the risk of water damage in your basement.
Conclusion
To summarize, installing a French drain is a practical solution for effective basement waterproofing. By carefully evaluating your property, planning the installation, and following the step-by-step process, you can greatly reduce water accumulation. Regular maintenance guarantees your system remains clear and functional, safeguarding your basement from moisture damage. Combining this method with additional waterproofing techniques will further enhance your protection against water intrusion, creating a dry and secure environment in your home.